Now that we’ve gone over how changing the different settings affect your final image, we will go over how to adjust the settings and produce an image of similar density. First we’ll discuss kilovoltage peak (kVp) and then onto milliampere (mA).
Kilovoltage peak (kVp)
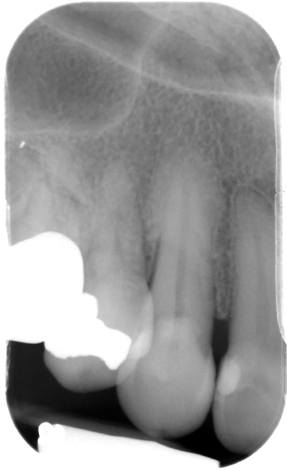
A few weeks ago we went over kVp settings and how it affects the grayscale of an image. So first we are going to start with changing kVp but keeping both the mA and time settings constant. An increase in kVp will result in an overall darker image with lower contrast. A decrease in kVp will result in an overall lighter image with higher contrast.
Now onto changing kVp to acheive your desired contrast level but keeping the overall density of the image the same. The rule that applies here is frequently referred to as the ‘Kilovoltage peak rule’. The rule is as follows
1) When kVp is decreased by 15, exposure time should be doubled.
2) When kVp is increased by 15, exposure time should be decreased in half.
For example, if you have the settings of 90 kVp and a 0.25 second exposure and want to increase overall contrast by reducing the kVp to 75, you would need to increase the exposure time to 0.5 seconds to produce an image of the same density but with more contrast. And for a change in the opposite direction. If you have the settings of 50 kVp and 0.5 second exposure and want to increase the kVp to 65, you would need to decrease the time to 0.25 seconds to produce an image of the same density.
Milliampere (mA)
As we discussed earlier, changing mA changes the quantity of x rays produced. First we are going to discuss what happens when you change mA but keep the kVp and time settings constant. An increase in mA will result in an overall darker image. A decrease in mA will result in an overall lighter image.
Now how to change mA and maintain the desired overall density of an image. To determine the changes necessary you must first understand the term milliampere-seconds (mAs). This is the product of the mA and the time (mA x exposure time [seconds] = mAs). For example, if you have the settings of 10 mA with an exposure time of 0.5 seconds, you would have a mAs of 5 (10 mA x 0.5 seconds = 5 mAs). To produce an image of the same overall density you would need to maintain 5 mAs no matter what the mA or exposure time are. So if you were to increase the mA (10 to 20), you would need to decrease the exposure time to 0.25 seconds to maintain a mAs of 5 (20 mA x 0.25 seconds = 5 mAs). This will produce an image of the same overall density.
I hope this short series on x ray unit settings has been informative. If you have any questions or comments, please let me know.
Thanks and enjoy!


Hi Dr
I have a question with regards to kvp. It has been mentioned in the previous post that higher kvp produces an image light contrast. In this post you have mentioned that high kvps produce darker images, could you please clarify it? I am a bit confused . Thanks
A higher kVp will produce an overall gray image with low contrast if the mA and exposure time are changed to compensate for the kVp change.
Increasing the kVp has a secondary effect on the number of x rays produced so increasing the kVp will also increase the number of x rays. If the mA and exposure time are not changed this results in an overexposure of an image creating the darker image.
Shouldn’t a light contrast images have more grays that make it appear lighter ?
Yes, an image with low contrast will appear overall more gray which can give it an overall lighter appearance.
Dr,
I actually understood it now :)but you could respond to others who might have the same question. Thank you
Sorry didn’t get to your questions sooner but I’ll make sure to still answer them. 🙂
Thanks. High kvp- low contrast – lots of grays- dark images.